|
|
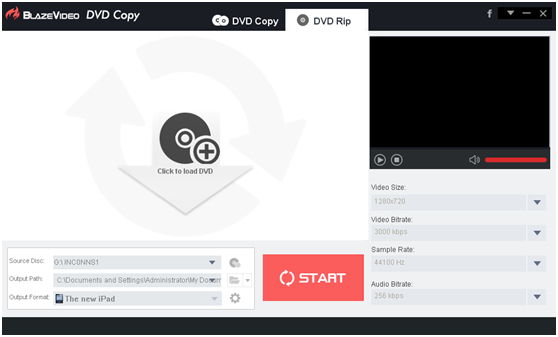
How to Rip DVD to Portable DevicesBesides DVD copy feature, BlazeVideo DVD Copy also enables users to rip DVD to popular video formats that are supported by iPad, iPhone, iPod, PSP, HTC, Nokia, Android phones or other portable devices. Before ripping DVD, you can also edit your DVD movie by its rich DVD editing features. The following is the step by step guide. Guide: Rip DVD to iPad/iPhone/iPod...Step 1: Open this DVD Ripper:Click the
Step 2: Add DVD movie onto this DVD to video converterClick on the
Tip: If you want to combine several DVD chapters into one before DVD to video converting, please check the Merge tab. And then click OK to load the selected DVD contents. Step 3. Select output folder.Click on the Step 4. Select output video format.First right click on the User Interface, then you would s see a pop-up button, Choose the output video format you want in the drop down list of "Output Format".
Step 5. Rip DVD.
Click on the Guide: How to Edit DVD before DVD to Video ConversionDirectly click on the "Edit" button to go to edit box as below:
Step 2. First click
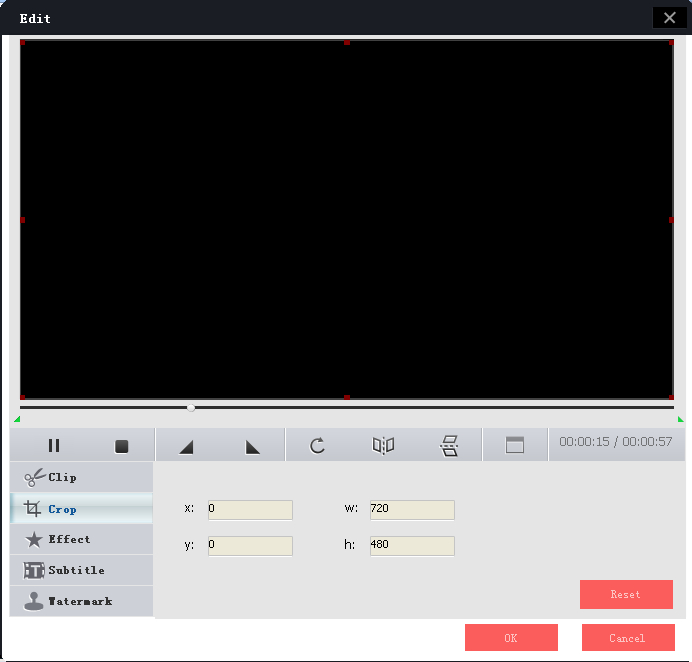
Step 3. Click 1.2 Crop: Crop video sides as you like. Step 1. In Edit box, click
Step 2. Drag the 8 red points to crop the video image size as you like.
Step 3. Click 1.3 Effect: Add special effects to personalize your video or DVD (brightness, hue, saturation and contrast). Step 1. In Edit box, click
Step 2. Drag the bar to change or adjust special effects (brightness, hue, saturation and contrast) onto your selected video or DVD: Step 3. Click 1.4. Subtitle: Add subtitle in your video file. (Available in all versions of Video Magic) Step 1: In Edit box, click
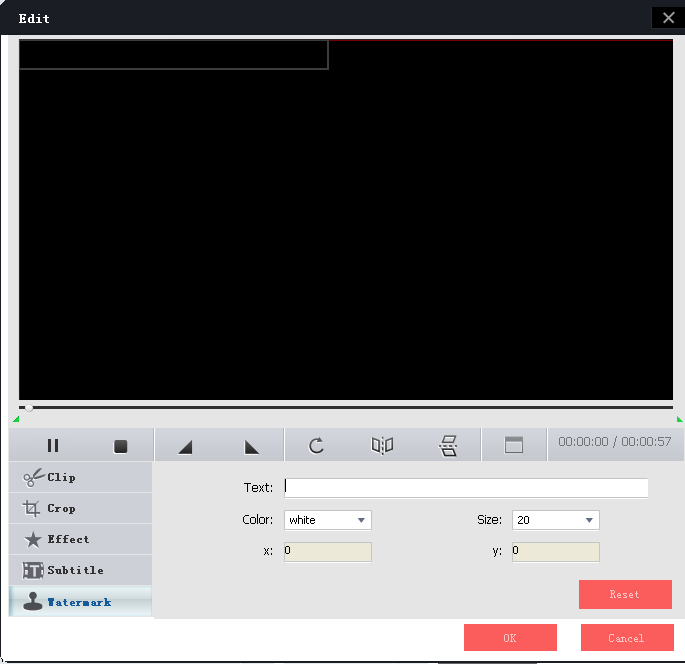
Step 2. Click 1.5. Watermark: Add watermark on your video files. Step 1: In Edit box, click
Step 2. Add your favorite text in the "Text " and drag the added text on the screen to select the watermark position. You can also drop down to select your preferred color and size for your watermark. Step 3. Click |
If you can’t find what you want here, please contact us. We'd love to hear from you or your friends. Please send an email to:
support@blazevideo.com We will reply you in 24-72 hours. Please contact us again after 72 hours without response. Search Help:
Help with other products
|
 , you will open the Load DVD box:
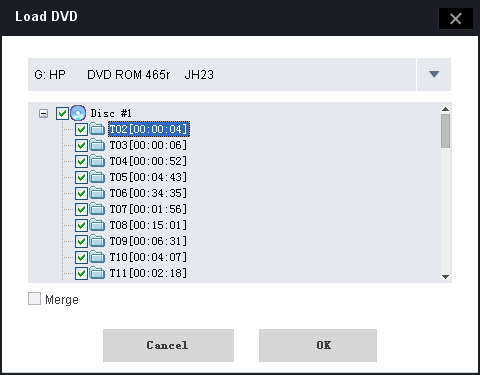
 , click on the “Select All” button to choose the DVD titles you want to rip.
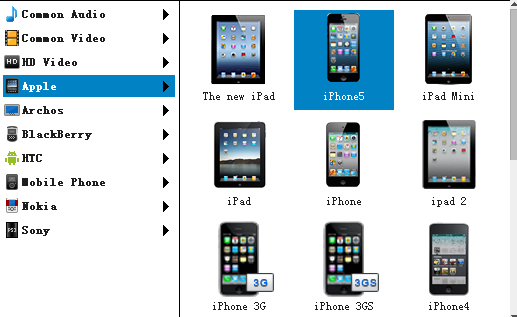
 button, BlazeVideo DVD Copy will start to rip DVD at a superfast speed.
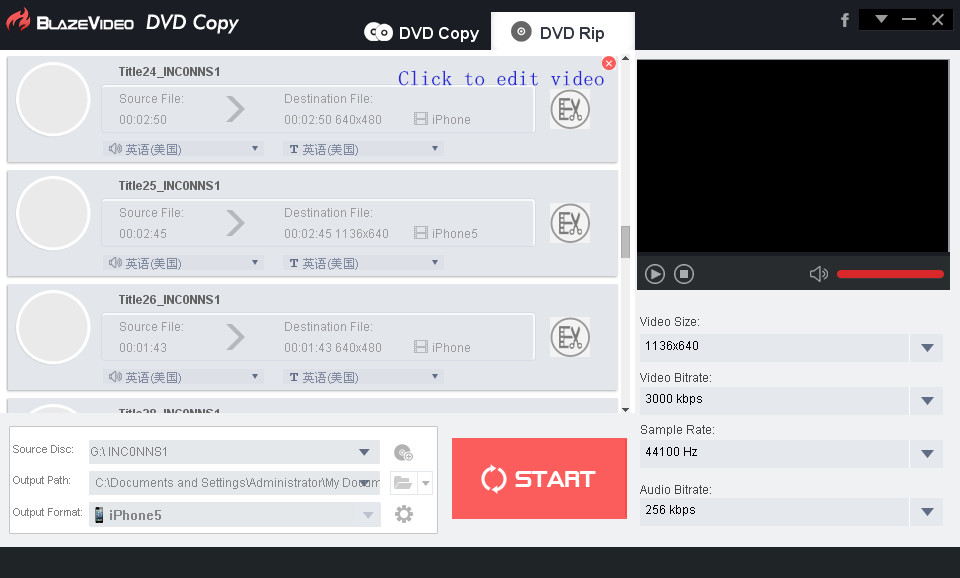
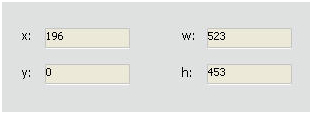 :Show your cropped video info.
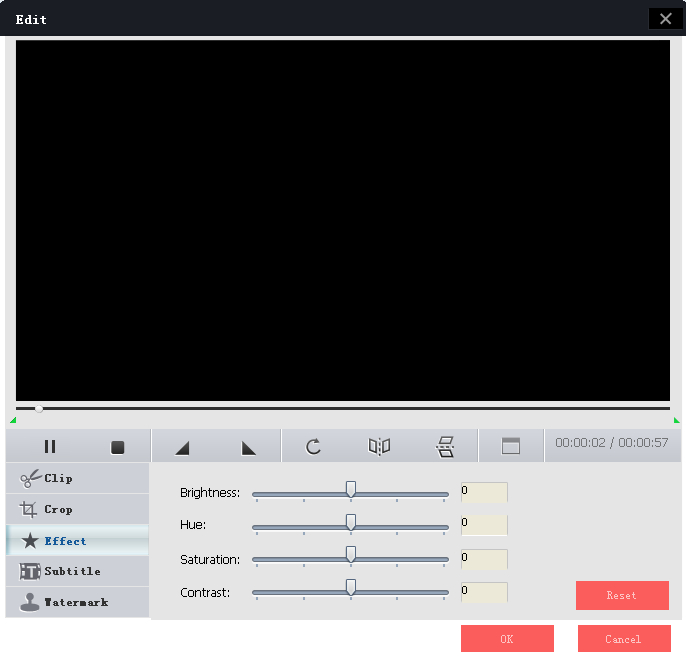
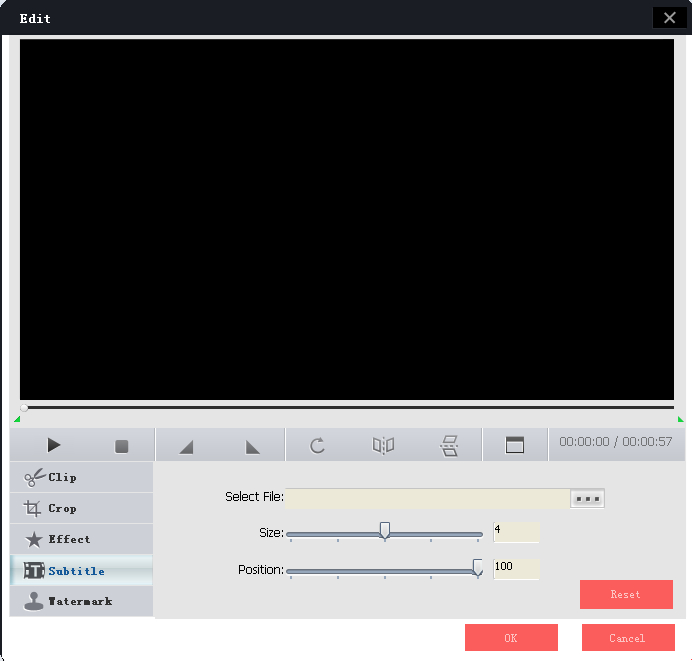
 : Drag to change the added subtitle size and vertical position.