|
|
Edit Photos
Select an image, click "Edit" button, or right click a thumbnail then select "Edit", Edit window will appear as below:
Select Photos
In Preview stage, select one or more photos, the selected photos will display in Picture Tray.
 Note: If holding photos in Picture Tray, you will keep the selected photos in Picture Tray even when you switch to other window. Note: If holding photos in Picture Tray, you will keep the selected photos in Picture Tray even when you switch to other window.
Hold Photos:
1. Select a photo and click "Hold" button in Picture Tray;
2. Select a photo and drag it into Picture Tray;
3. Select a photo and right click to select "Hold in Picture Tray"
Clear Photos from Picture Tray:
1. Select the desired photo and click "Clear" button, you will clear the selected photo from Picture Tray.
Note: If not select any photo in Picture Tray, you will clear all photos in Picture Tray.
Edit Photos
Select an image, click " Edit" button, or right click a thumbnail then select " Edit", Edit window will appear.
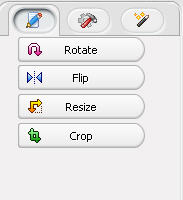
- General:
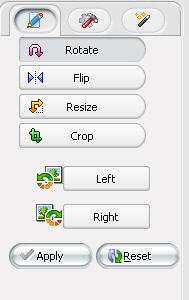
- Rotate: Click"Left" button to counter-clockwise rotate image; click "Right" button to clockwise rotate image.
Click "Apply" to apply the result, click "Reset" to keep the original status.
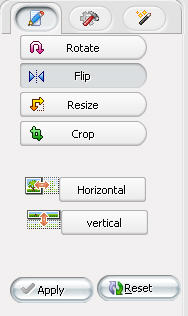
- Flip: Click "Horizontal" to horizontally flip image, click "Vertical" to vertically flip image.
Click "Apply" to apply the result, click "Reset" to keep the original status.
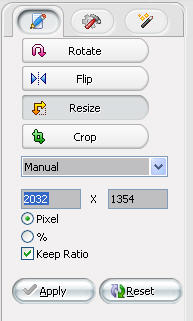
- Resize: Default is to "Manual" resize, there are below three ways to resize:
1. Drag the arrow button around the image to resize, the current image size will display in the left edit box;
2. Type your desired width and height, or type your desired percent number;
3. Drop down click to select desired resolution to resize.
Keep Ratio: Select to keep the width to height ratio as same as original image.
Click "Apply" to apply the result, click "Reset" to keep the original status.
- Crop: There are two crop modes available, "Free Crop" and "Keep Aspect Ratio". Default is "Free Crop".
Free Crop: Move highlight area or freely drag the arrow button around the image to select crop area.
Keep Aspect Ratio: Select to keep the width to height ratio as same as original image.
Click "Apply" to apply the result, click "Reset" to keep the original status.

- Enhance Photos:
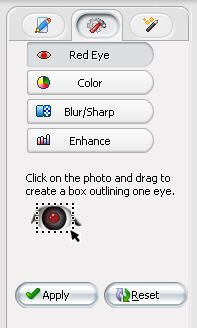
- Remove Red Eye: drag and drop to select the red eye area, you will see the after effect of removing red eye.
Click "Apply" to apply the result, click "Reset" to keep the original status.
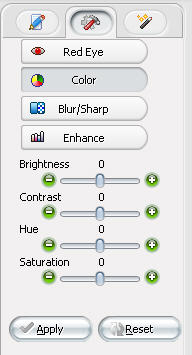
- Adjust Color: To change brightness, contrast, hue and saturation of the image. Drag the slide bar or click "-", "+" button to adjust.
Click "Apply" to apply the result, click "Reset" to keep the original status.
- Blur/Sharp: Rightwards drag the slide bar to make image sharp; leftwards drag to be blur.
Click "Apply" to apply the result, click "Reset" to keep the original status.

- Enhance: Auto adjust color of photos. There are three enhance effects: Normalize, Stretch, Equalize. Click one desired effect to enhance image.
Click "Apply" to apply the result, click "Reset" to keep the original status.

- Create:
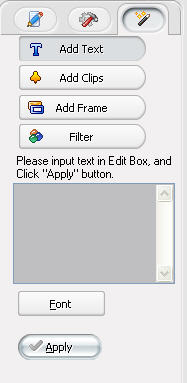
- Add Text: Type characters in Edit Box, click "Font" button to select font style, size, effect and color in the pop-up box.
Click "Apply", the characters will be added into image. Left click the text, you can modify the size and color of text.
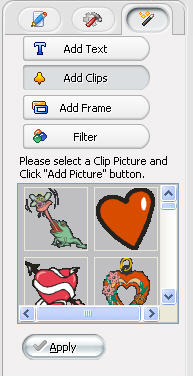
- Add Clips: Click and select a clip in the clip list, the clip will be added into the image.
Click "Apply" to add clips; click other clip, you will change to other clip.
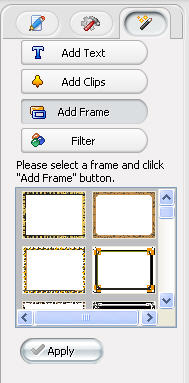
- Add Frame:
Click and select a frame in the frame list, the frame will be added into the image. Click "Apply" to add frames; left click the frame, you will select other frame.
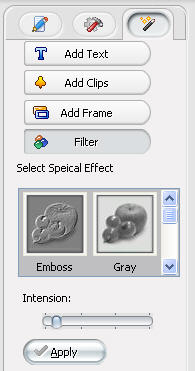
- Filter:
Select a filter, drag the intension bar to adjust the effect, click "Apply" to apply the filter.
Save Photos
After finishing editing, click "Save" or "Save As" button in the tool bar, or select "File->Save" or "File->Save As" menu, you will save the editted image.
Note: If directly save image, BlazePhoto will backup the original photo and append. BAK to extension in current directory. You can also set the saving option in Setting by tick-on or tick-off "Backup files and append .BAK to extension".
Edit Tool Bar

- Undo: cancel last operation.
- Redo: repeat last operation.
- Copy:copy selected item onto clipboard.
- Paste:paste the item on clipboard onto image.
- Delete:delete the selected items, such as added clip, frame or text.
- Merge All: merge all the added items(clip, frame, text, etc) into the image, not allowed to modify again.
- Save:save current image.
- Save As:save current image as another file.
- Zoom Out: display current image with smaller size(keeping original image size)
- Zoom Bar: drag to change image displaying size(keeping original image size).
- Zoom In: display current image with larger size(keeping original image size)
- Fit to Window: make current image fit to window.
- Actual Size: display picture with actual size.
- Show/Hide Original Picture: toggle-switch to show or hide the original picture
|
|
Search Help:
Help with other products
|